Brewing a Brand New Coffee: What’s Your Go-To Recipe?
All coffees are different, and so it stands to reason that over time, you might modify your recipe to better accentuate certain characteristics of that unique coffee. But let's say that you're brewing up a brand new coffee for the first time, and you only get one attempt to make it taste as good as you can.
What's your go-to recipe?
-
What brewing device should you use?
-
What temperature should you set your kettle to?
-
What grind size are you using?
-
How long should you bloom for?
-
What pour stages should you try?
-
And are your results usually good?
These are questions that we asked to some of the most renowned coffee professionals (in addition to supplying our own answers to this question as well) so that we could compile a set of brewing blueprints for you to try out at home, in the event that you find yourself in this situation.
One thing of quick note: many of the recipes suggested here go against conventional wisdom, but take assurance that everyone selected for this conversation piece very much knows what they are talking about. Whenever I spot something interesting, I ask the interviewee to expand a little on their thought process.
Alexa Elizabeth Lee
UK Cup Tasters Champion 2024, SCA Judge, Saint Espresso
I like using a flat bottom brewer like Orea. It's one of my favourite brewers, and has never failed me. Even when brewing brand new coffees for the first time.
I'll go for a smaller dose at first, like 13g. So that if it mess it up the first time, it's not too much of a waste. I like to bloom it for at least 3 times the dose weight, so 40g in this case, and for a duration between 45s - 1 minute, depending on when it was roasted.
I'll go for a 1:16.6 ratio as I found this worked best across a lot of different coffees, and I like to use a grind size roughly equivalent to 22-23 clicks on the Comandante grinder.
Dose: 13g
Water: 215g
Grind Size: 22-23x Comandante
Natdanai Denham
3rd English Aeropress Championship 2023, UK Cup Tasters Finalist, Director of Jan Lek
Water: 225g of total water
Water Temperature: 94°C
Pour 2: 0:30 - pour 65g
Pour 3: 1:10 - pour 65g
Pour 4: 1:50 - pour 65g
Target Brew Time - 2:45 - 2:50
Consistency Across Varieties: This recipe is tailored to provide a balanced, well-extracted cup regardless of the coffee’s origin or roast level, making it ideal for “exploration brews.” It offers flexibility and allows you to adapt based on grind size while maintaining an efficient workflow.
Balance of Extraction & Body: The 1:15 ratio, with medium-coarse grind and controlled pours, balances clarity and sweetness while avoiding over-extraction. This creates a versatile foundation for a light-medium body and juicy finish.
Accessibility: Using tap-filtered water at 100–120 ppm ensures a reproducible brew for most users without the need for high-end water solutions. This makes it more approachable.
Is this something that you settled on over time through trial and error?
Yes, it a reflects an evolution based on personal experience and numerous trial brews. The progression of smaller pour sizes (after bloom) shows deliberate experimentation to enhance control over extraction and avoid channeling. This recipe probably represents your “sweet spot” for extraction efficiency and flavour balance after trying different variables
Also, many others have been doing long bloom ratios (3x dry weight), did ou experiment much with longer blooms, or was this something that you tried and decided was less optimum for your preferences?
Longer bloom ratios (e.g., 3x dry weight) are excellent for coffees with very dense beans or a high amount of CO2, such as fresh, lightly roasted coffees. However, they can sometimes: for me can extend brew times too much, reduce control over extraction balance if not adjusted carefully, & can compromise sweetness for clarity in some cases.
By sticking to a 2x bloom ratio (30g for 15g), keep the brew approachable while ensuring the blooming phase is efficient enough to release excess gas without stalling the brew.
More on my experience behind shorter bloom: prioritise balance over chasing extreme clarity or body, quicker bloom works well with most coffees, avoiding uneven extraction due to extended pre-wetting, & By keeping the bloom shorter, you ensure subsequent pours fully saturate the bed without over-compensating.
I’ve tried longer blooms (e.g., 45–50g for 15g), I have found: It works well with some coffees but doesn’t universally yield great results. The extended bloom introduces variables like heat loss and inconsistency, especially with tap-filtered water. It shifts the focus toward clarity at the expense of sweetness and body, which may not align with my goal of a juicy, well-rounded brew.
If you prioritise peak flavour balance, shorter blooms often reduce complexity while still allowing for easy adjustments. You can fix your bloom in the result for coffee that have amazing floral notes.
Ted Longden
3rd UK Barista Championships 2023, Head Barista at WatchHouse
Water: 250g of total water
Water Temperature: 94°C
Alan Jarrar
CEO of Jokes Aside Coffee, Stav Se Espresso Bar and 50 Percent Arabica
Water: 500g of total water
Sharon Ip
2nd English Aeropress Championship 2024, Head Barista at TABxTAB
Cleo Tsai
Canadian Brewers Cup Finalist ‘24
Hello 👋 I am Cleo and I like brewing coffee!
Every time when I receive a bag of coffee, I always like to check the beans first and see the roast level, the sizes of each of the beans and even check if the variety is consistent with the bean sizes - we all learn something everyday and I love it.
Then there is a recipe in my mind. Normally I like to do 1:16.67 ratio, trying few things and this 15g ground coffee dose in, 250g water - This is my daily take, something I’m comfortable with.
Grind size, I like to do medium course, then water temperature will be 93 Celsius for the start. Of course later on, I might decide to adjust one or both of these, depends what results are we going to expect.
I do like Hario V60 brewing dripper and believe that’s the most affordable and common one to see in the market. Some of the coffees on instinct I know are going to be a bit tricky, for those coffees I will probably go for OREA v2 flat bottom dripper and using type-G filter paper, this is the one I te to use for anaerobic fermentation or other crazily processed stuff.
The reasons are, first, water floating in flat bottom in some case would be extracting fast and not cloaking during extraction. Second, I have more control in brewing aka comfortable and confident.
Brewer: Hario V60
Dose: 15g
Water: 250g
Water Temp: 93c
Grind Size: Medium Coarseness
Water composition: Brita Filtration
Pour 3: 1:00 - 60g circle pour in 6 seconds (180g total)
It brings out lots of sweetness and acidity which I like in my coffee!
When it’s at home, I like to use brita water, and it’s easier! When it’s at the cafe, cuz I know I have too much stuff I can play with, recently I got Apax water component and love it!
I hope you enjoy this recipe and let me know how it works! Cheers!
You mentioned that you enjoy using the Apax drops. Is there a method to your madness here?
Under what circumstances would you experiment with each of the drops, what are you looking for from each?
As home brewers who are willing to explore more for water chemistry and science behind, I’d like to suggest to read articles or even dig into some chemistry subjects. Here is good resource for that.
https://apaxlab.com/pages/faq
Your recipe is really simple and easy to replicate. The numbers are all very easy to follow.
Is this something that you settled on over time? Do you like it this way because it’s simple and ritualistic? Or are there other reasons that helped you come to this recipe?
This is the recipe I tried over the years and suits for almost every coffee! It’s simple and it’s easy to replicate, not only for coffee professionals serving coffee at the cafes but also for home brewers too!
Gage Quinn
Northern Filter Champion ‘23
How we brew a coffee is largely decided by how it's roasted. Different levels of bean solubility and density require different brew parameters. For best results, we focus on 3 main ones: device, water, ratio. Lighter roasted coffee prefers percolation brew methods, hotter water, and wider ratios. This is because lighter roasted coffee is typically less soluble, so favours more energy in the brew, more water, and more agitation which is all achieved by simply using a percolation brew method such as Orea, V60, and Kalita.
As that's what we tend to brew most, I'll give a typical recipe for lighter roasted coffee
Brewer: Orea V3
Dose: 12g @ 25 Comandante clix
Water: 200g @ 94°c (80-100ppm using APAX Lab)
00:00 Pour 30g at a slow rate (3g/s)
00:35 Pour to 105g (4g/s)
01:15 Pour to 200g (5-6g/s)
The first two pours can be spiral patterns, or I move the kettle stream to push down any floating bits of coffee and orange foam. Once the surface of the slurry is pale, you can pour faster.
The first two pours can be spiral patterns, or I move the kettle stream to push down any floating bits of coffee and orange foam. Once the surface of the slurry is pale, you can pour faster and in the center
This would be a typical recipe for maybe something like Harmony's Basha Bekele. It'll yield a super sweet cup with a strength of around 1.30% for optimal balance between intensity and flavour clarity. If I want to change anything about the brew, I'd look to change the three aforementioned parameters before changing anything else. Grind size remains a constant (yes even if I change coffees generally).
Team Harmony
Kish
Wholesale
Water: 250g of total water
Water Temperature: 93°C
Pour 2: 0:30 - pour 50g
Pour 3: 1:00 - pour 50g
Pour 4: 1:30 - pour 50g
Pour 5: 2:00 - pour 50g
Ben
Head of Coffee & Director
Brewer: Orea v4
Filter papers: Sibarist (Fast Flow) Martin Wölfl
Dose: 17-18g
Water: 275g
Grind Size: Comandante 26 clicks
Water Temperature: 94c
Water Composition: 115ppm (40ppm KH, 75ppm GH)
Pour 1: 0:00 - 50g in 6 seconds, concentric circle pour
Pour 2: 0:35 - 75g in 10 seconds, concentric circle pour (125g total)
Pour 3: 1:05 - 75g in 10 seconds, concentric circle pour (200g total)
Pour 4: 1:35 - 75g in 8 seconds, concentric circle pour (275g total)
TBT: 1:50 - 2:10
It can be quite difficult to convey flow rate through a text based medium, but this is the recipe that I have gravitated to recently as a starting point - mostly because it's just easy for me to remember, but also because the results have been pretty decent and repeatable.
I tried a number of times to work with smaller doses - 12g, 13g, etc. but it never works very well for me and the brews always have a way of tasting like everything has been dialled down to 7/10 in intensity - my friend Lewis from Functional accessories always seems to find a way of making his brews taste much better at those low doses. So alas, I have to brew at higher doses to get any kind of flavour out of my coffees - but that's probably technique related.
Every few months I tend to try something new when brewing, and right now, that obsession tends to be around modifying dosage, and experimenting a lot more with lower brew temps, as it seems to have become fashionable again to muck around with 92, 93, 94, etc - rather than brew at boiling.
I find that with these new recipes, I'm trading aromatic intensity for cup flavour clarity, which is a trade I'm happy enough with. I've gone from aiming for a 2:45 brew time in 2016, to a 4:30 brew time in 2020 on a Fellow Stagg X, to now trying to keep my brews under the 2 minute mark, as I've gradually graduated towards faster, clarity based brewing.
I wouldn't try this recipe unless your brewer and papers match, as the Orea brewer is pretty much designed for fast exit flow and the Sibarist papers are designed especially not to clog, so if you're using a Hario V60 with normal Hario papers, trying to match a 1:50 percolation time, the brews will taste bad and you'll need to grind on like... grind size 40.
If you do decide that you want to try this particular recipe out, and you have all the equipment, I would definitely suggest waiting until your coffee is at least 21 days off roast and thoroughly rinsing your paper filter, as if your coffee has a lot of trapped gasses, you might find that it just tastes and smells a bit like hot wood. If you're working with a washed coffee, or a coffee that produces a lot of chaff - blow the chaff away as much as you can.
While I experiment which quite a lot of things, I've never really been personally very happy with brewing at a 1:15 ratio or below - I know it's fine and I have had some very nice brews at 1:15, but out of personal preference, I prefer to just give myself a little bit of an extraction buffer with a slightly longer ratio than 1:15 - as that ratio (when I'm brewing) can sometimes walk the line between being well extracted, and leaving flavour behind in the brewer.
Want to test these recipes for yourself?
Check our our single origin subscription and try these recipes with brand new beans every week, fortnight or month. We also offer subscription products for your office and as a decaffeinated product also.
Equally, if you're just looking for a one off - we have a huge range of single origin coffees; so there's plenty of room for experimenting!
Frequently Asked Questions
1. Do water temperatures really matter that much when brewing filter coffee?
According to Junchao Huang (Calico Coffee), water temperature is not the main factor influencing extraction. He believes that grind particle size distribution is more important, and that controlled agitation and flow rate create more consistent extractions.
2. Why do some professionals prefer flat-bottom brewers over conical drippers?
Carly Green prefers flat-bottom style brewers like the Kalita Wave because they produce a profile closer to cupping, helping her understand a new coffee’s flavour quickly. Sharon Ip also notes flat-bottom brewers like the FLO or Orea produce cups that are full of character, easy-drinking, and reduce the risk of over-extraction.
3. Is blooming always necessary in pour-over brewing?
Most contributors bloom their coffee — but Ted Longden (WatchHouse) showed that you don’t always need to. Using the Clever Dripper, he pours all water in at once, stirs, and drains at 2:30. Because extraction happens via immersion first, the coffee degasses without a traditional bloom stage.
4. Why do so many recipes start with 15g doses?
Several competitors (including Carly, Junchao, Natdanai, and Ted) start at 15g because it’s a balanced dose that works across origins and roast levels, giving enough strength without wasting coffee when adjusting recipes.
5. Why would someone choose a smaller dose like 12–13g?
Alexa Elizabeth Lee starts at 13g so that if she gets the brew wrong, she isn’t wasting coffee. Gage Quinn also brews with 12g to focus on clarity and sweetness at a strength around 1.30%.
6. Does water composition change the flavour?
Sharon Ip brews with 50–80ppm water for lighter body, complexity, and easy drinking. Natdanai Denham prefers 100–120ppm because it produces balanced, accessible brews that most people can reproduce without special water.
7. What’s a safe, universal starting recipe for a brand new coffee?
Cleo Tsai uses a simple recipe that works for nearly anything: 15g coffee, 250g water, 93°C, and 4 steady pours — because it brings out sweetness and acidity without much dialing in.
8. Why do some baristas up-dose for filter?
Sharon Ip brews around a 1:13.5 ratio because it adds punchiness, stronger character, and avoids negative aftertaste. She only bypasses with water afterward if the cup tastes “too cramped”.
9. Why does Ted (using the Clever Dripper) brew at 94°C?
Ted Longden says 94°C is never too hot or too cool for the coffees he works with and helps highlight positive flavours while minimising negative ones — making it a sensible starting point for most brews.
More Guides You Might Like
• The Best Coffee Scales 2025 — our breakdown of the most accurate and reliable scales for home and café brewing.
• How Coffee Pairs with Music — exploring how sound affects flavour perception.
• Learn more about Junchao’s methodology during our bar takeover with Calico Coffee in London: Read here.
• Espresso lover? Check out our guide to the Best Coffee Tampers.
Does grinding fresh matter? Or is Pre-ground coffee ok?
The importance of using a good coffee scale
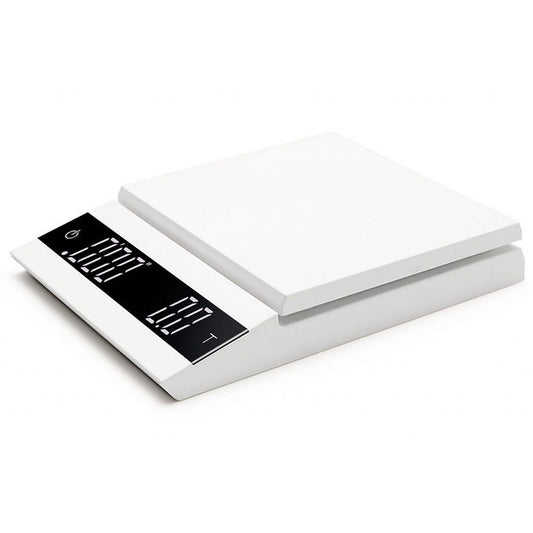
Most recipes in this article rely on precise ratios, controlled pours, and consistent flow rates. If you don’t have time to read the full buyers guide, we recommend the Felicita Parallel — a café-grade waterproof scale with fast response time and high accuracy.
Try These Recipes Yourself
If you'd like to experiment with the brews shared by the baristas in this article, you can grab some freshly roasted beans here:
https://www.harmonycoffee.co.uk/collections/our-coffee









1 comment
Brilliant blog entry, appreciate the time and effort to produce this and thanks to the contributors for sharing.